If you want to be the latest in nail art and amaze with original and spectacular decoration nails, do not miss the following article; How to Make A Gradient With Nail Polish. We bring you a simple technique which consists of a gradient nails with different colors, the end result is impeccable. Notice the step by step and prepare to look well-arranged with a creative and Layout hands.
Instructions How to Make a Gradient with Nail Polish
Layering
Before painting your nails in degradation, apply a layer of gloss or hardener on them. This step is key to protecting your nails and makes the final design remains intact for longer.
Shading
Now choose shades of nail polish that you like to make the gradient. Ideally, choose two or three shades of the same color range to blend in, but can also try completely different colors. We have chosen three shades of green range. Once you have decided the colors, apply the darker base for the final effect is well marked tone.
Cover Your Finger
A useful trick to prevent staining our fingers at the time of the gradient, is to place strips of tape around the nails. Look at the images to find out which areas must exactly cover.
Horizontal Stroke
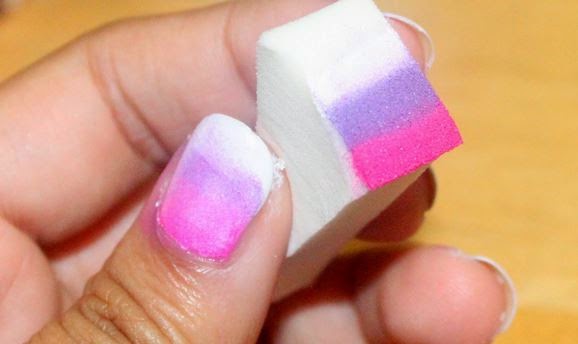
Grab a sponge we use to apply foundation and filled a bowl with a little water. Enter the sponge into the bowl and strain the mixture to remove excess water. The key is that the sponge remains moist and not wet. Now, the sponge gives a horizontal stroke of each of the chosen nail enamels.
More Gradient Effect
For the gradient effect is well defined in the nails, sponge passes from right to left or vice versa by gently pat. If you want to give more intensity to the colors, try to pass back the sponge on the nails.
Light Coat
Finally, when it has dried, apply a light coat of gloss or hardener to set design and reduce rough texture.
Ready! In a few minutes you will have a degraded decorated very nice and original effect nails. Dare to innovate and test the design with different colors


